Spring 容器的启动过程
Spring 容器的启动过程
包含
- 含父子容器,含全注解驱动,含web.xml启动
- ContextLoader源码分析
- SpringBoot容器
0.前言
主要介绍Spring容器(父子容器)的启动过程。
当ContextLoaderListener和DispatcherServlet一起使用时, ContextLoaderListener 先创建一个根applicationContext,然后DispatcherSerlvet创建一个子applicationContext并且绑定到根applicationContext
在Spring的应用一启动会加载感兴趣的WebApplicationInitializer接口下的所有组件,这里只有上节我们自己继承AbstractAnnotationConfigDispatcherServletInitializer的类MyWebAppInitializer。
if (!waiClass.isInterface() && !Modifier.isAbstract(waiClass.getModifiers()) &&
    WebApplicationInitializer.class.isAssignableFrom(waiClass)) {
    try {
        initializers.add((WebApplicationInitializer)
                         ReflectionUtils.accessibleConstructor(waiClass).newInstance());
    }
    catch (Throwable ex) {
        throw new ServletException("Failed to instantiate WebApplicationInitializer class", ex);
    }
}

...

// 排序后,循环调用onStartup方法,进行初始化
AnnotationAwareOrderComparator.sort(initializers);
for (WebApplicationInitializer initializer : initializers) {
    initializer.onStartup(servletContext);
}
接下来看看onStart()方法的实现AbstractDispatcherServletInitializer#onStartup:
public void onStartup(ServletContext servletContext) throws ServletException {
    super.onStartup(servletContext);
    registerDispatcherServlet(servletContext);
}
// super
public void onStartup(ServletContext servletContext) throws ServletException {
    registerContextLoaderListener(servletContext);
}
到此我们发现我们注解驱动,和我们的web.xml驱动可以说就一样了。分两步了:
- registerContextLoaderListener(servletContext):注册ContextLoaderListener监听器,让它去初始化Spring父容器
- registerDispatcherServlet(servletContext);注册DispatcherServlet,让它去初始化Spring MVC的子容器
protected void registerContextLoaderListener(ServletContext servletContext) {
    // 创建父容器
    WebApplicationContext rootAppContext = createRootApplicationContext();
    if (rootAppContext != null) {
        // 创建listener 并且把已经创建好的容器放进去
        ContextLoaderListener listener = new ContextLoaderListener(rootAppContext);
        // //放入监听器需要的一些上下文,此处木有。一般都为null即可~~~。若有需要(自己定制),子类复写此方法即可
        listener.setContextInitializers(getRootApplicationContextInitializers());
        // 把监听器加入进来  这样该监听器就能监听ServletContext了,并且执行contextInitialized方法
        servletContext.addListener(listener);
    }
    else {
        logger.debug("No ContextLoaderListener registered, as " +
                     "createRootApplicationContext() did not return an application context");
    }
}
监听器是是干啥的:未来会通过这个叫监听器的东西搞些事情
createRootApplicationContext:如下,创建了一个AnnotationConfigWebApplicationContext并且把配置文件注册进去了
@Override
@Nullable //Spring告诉我们,这个是允许返回null的,也就是说是允许返回null的,后面会专门针对这里如果返回null会是怎么样处理说明
protected WebApplicationContext createRootApplicationContext() {
    Class<?>[] configClasses = getRootConfigClasses();
    if (!ObjectUtils.isEmpty(configClasses)) {
        AnnotationConfigWebApplicationContext context = new AnnotationConfigWebApplicationContext();
        context.register(configClasses);
        return context;
    }
    else {
        return null;
    }
}
继续往下走:执行registerDispatcherServlet
protected void registerDispatcherServlet(ServletContext servletContext) {
    //Servlet名称 一般用系统默认的即可(dispatcher),否则自己复写此方法也成
    String servletName = getServletName();
    Assert.hasLength(servletName, "getServletName() must not return null or empty");

    //创建web的子容易。创建的代码和上面差不多,也是使用调用者提供的配置文件,创建AnnotationConfigWebApplicationContext.  备注:此处不可能为null
    WebApplicationContext servletAppContext = createServletApplicationContext();
    Assert.notNull(servletAppContext, "createServletApplicationContext() must not return null");

    //创建DispatcherServlet,并且把子容器传进去了。其实就是new一个出来,最后加到容器里,就能够执行一些init初始化方法了~
    FrameworkServlet dispatcherServlet = createDispatcherServlet(servletAppContext);
    Assert.notNull(dispatcherServlet, "createDispatcherServlet(WebApplicationContext) must not return null");

    //同样的 getServletApplicationContextInitializers()一般也为null即可
    dispatcherServlet.setContextInitializers(getServletApplicationContextInitializers());

    //注册servlet到web容器里面,这样就可以接收请求了
    ServletRegistration.Dynamic registration = servletContext.addServlet(servletName, dispatcherServlet);
    if (registration == null) {
        throw new IllegalStateException("Failed to register servlet with name '" + servletName + "'. " +
                                        "Check if there is another servlet registered under the same name.");
    }

    //1表示立马执行哦,没有第一次惩罚了
    registration.setLoadOnStartup(1);
    registration.addMapping(getServletMappings());//调用者必须实现
    registration.setAsyncSupported(isAsyncSupported());//默认就是开启了支持异步的

    //处理自定义的Filter进来,一般我们Filter不这么加进来,而是自己@WebFilter,或者借助Spring,
    // 备注:这里添加进来的Filter都仅仅只拦截过滤上面注册的dispatchServlet
    Filter[] filters = getServletFilters();
    if (!ObjectUtils.isEmpty(filters)) {
        for (Filter filter : filters) {
            registerServletFilter(servletContext, filter);
        }
    }

    //这个很清楚:调用者若相对dispatcherServlet有自己更个性化的参数设置,复写此方法即可
    customizeRegistration(registration);
}
然后继续执行,就来到了ContextLoaderListener#contextInitialized执行此监听器的初始化方法(注意:到了此处,就和web.xml方式一模一样了)
但是不一样的是,注解驱动的此时候,我们的ContextLoaderListener对象已经持有WebApplicationContext的引用了(但是还没有放进ServletContext里面去,需要注意),所以会稍微有点不一样。
public WebApplicationContext initWebApplicationContext(ServletContext servletContext) {
// 虽然注解驱动传进来的监听器对象持有WebApplicationContext的引用,但是并没有放进ServletContext容器
if (servletContext.getAttribute(WebApplicationContext.ROOT_WEB_APPLICATION_CONTEXT_ATTRIBUTE) != null) {
throw new IllegalStateException(
"Cannot initialize context because there is already a root application context present - " +
"check whether you have multiple ContextLoader* definitions in your web.xml!");
}
servletContext.log("Initializing Spring root WebApplicationContext");
Log logger = LogFactory.getLog(ContextLoader.class);
if (logger.isInfoEnabled()) {
logger.info("Root WebApplicationContext: initialization started");
}
long startTime = System.currentTimeMillis();
try {
// Store context in local instance variable, to guarantee that
// it is available on ServletContext shutdown.
if (this.context == null) {
this.context = createWebApplicationContext(servletContext);
}
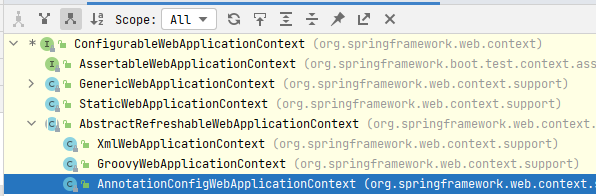
if (this.context instanceof ConfigurableWebApplicationContext) {
ConfigurableWebApplicationContext cwac = (ConfigurableWebApplicationContext) this.context;
if (!cwac.isActive()) {
// The context has not yet been refreshed -> provide services such as
// setting the parent context, setting the application context id, etc
if (cwac.getParent() == null) {
// The context instance was injected without an explicit parent ->
// determine parent for root web application context, if any.
ApplicationContext parent = loadParentContext(servletContext);
cwac.setParent(parent);
}
configureAndRefreshWebApplicationContext(cwac, servletContext);
}
}
servletContext.setAttribute(WebApplicationContext.ROOT_WEB_APPLICATION_CONTEXT_ATTRIBUTE, this.context);
ClassLoader ccl = Thread.currentThread().getContextClassLoader();
if (ccl == ContextLoader.class.getClassLoader()) {
currentContext = this.context;
}
else if (ccl != null) {
currentContextPerThread.put(ccl, this.context);
}
if (logger.isInfoEnabled()) {
long elapsedTime = System.currentTimeMillis() - startTime;
logger.info("Root WebApplicationContext initialized in " + elapsedTime + " ms");
}
return this.context;
}
catch (RuntimeException | Error ex) {
logger.error("Context initialization failed", ex);
servletContext.setAttribute(WebApplicationContext.ROOT_WEB_APPLICATION_CONTEXT_ATTRIBUTE, ex);
throw ex;
}
}